Home > Settlement > Security Balance Query
1. Functional Overview
As a user with the appropriate permissions, you can use Xact Web to perform queries and view security positions.
3 Settlement
3.1 Security positions
3.1.1 Query
To access Security positions, select Cash & Liquidity, then Security positions from the menu. The Security positions query page will open.


Security positions Query Screen Layout
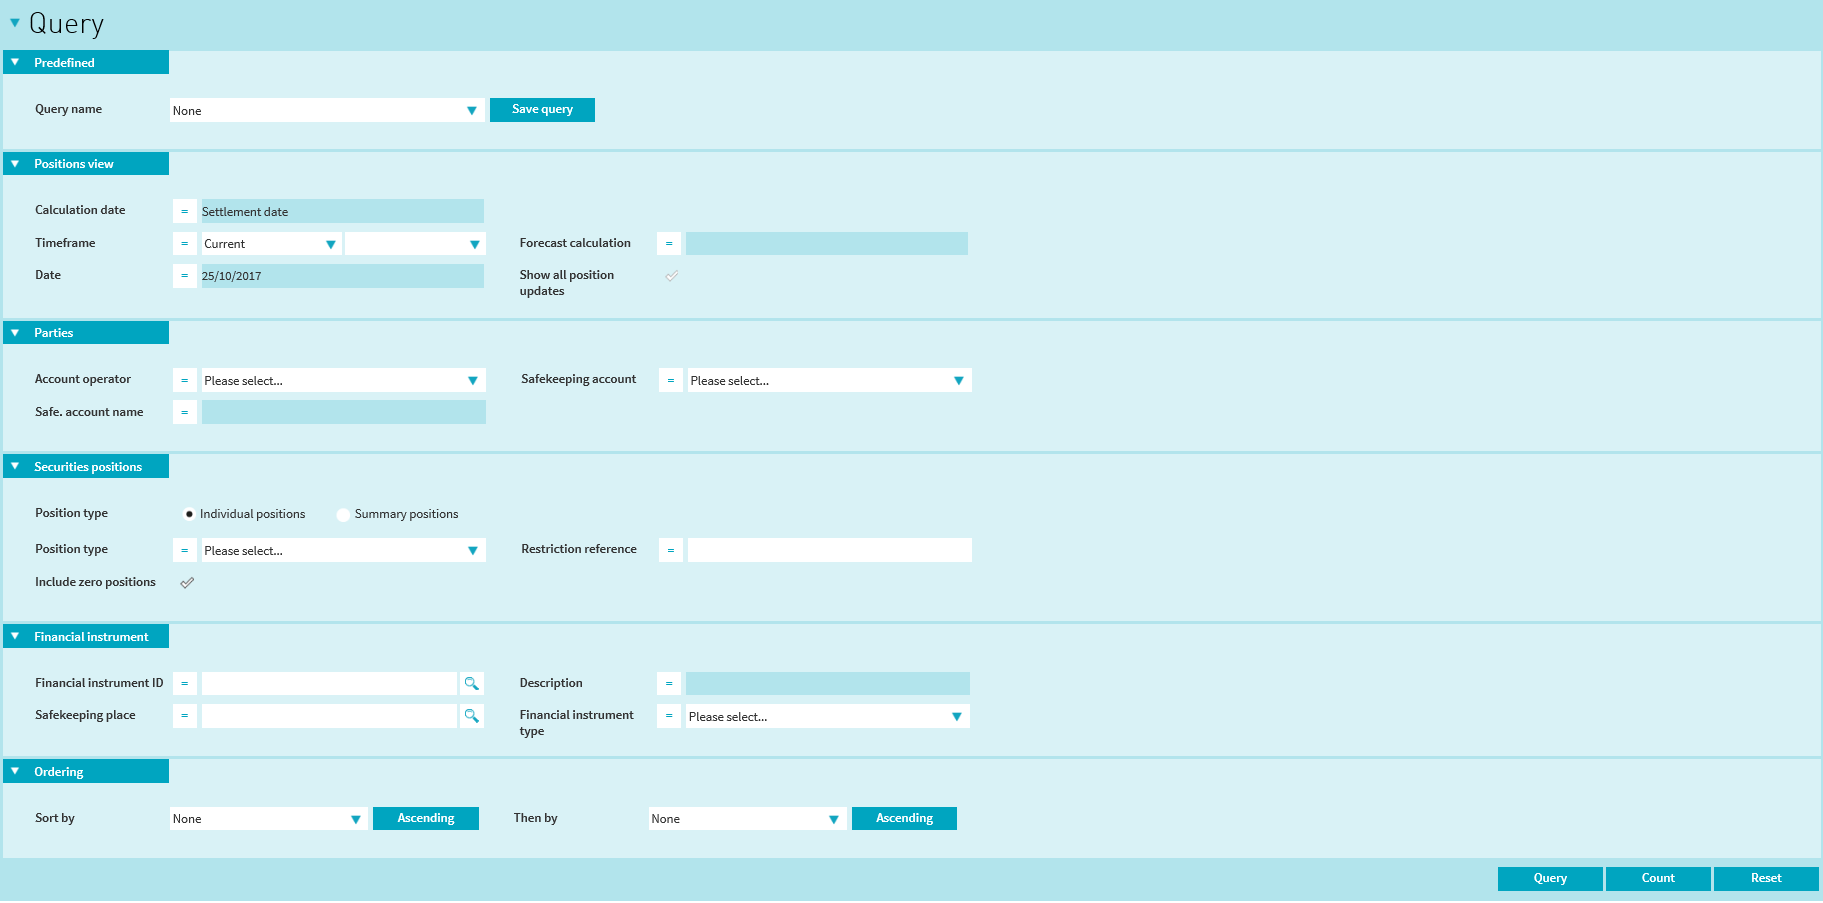
Field descriptions
| Section | Field Name | UI Field Type | Operators | Possible Values |
|---|---|---|---|---|
| Predefined | Query name | Select one menu | N.A | List of predefined queries saved by the user |
| Balances view | Timeframe | Select one menu | = |
Current with Previous closing value Forecast with End of business, Business day +1, Buisness day +2, Business day +3 values Historic with Closing, Intraday values |
| Date | Date picker | All | dd/mm/yyyy | |
| Currency | Select many list box | Not = / = | Any Clearstream settlement currency | |
| Show all balance updates | Checkbox | N/A | Yes, No | |
| Include zero balances | Checkbox | N/A | Yes, No | |
| Parties | Account | Select many list or Input text | = | ANY |
| Account name | Output text | N/A |
Character string where: minLength 5 maxLength 35 pattern[0-9a-zA-Z\-\?:\(/)\.,'\+ ] |
|
| Ordering | Sort by | Select one menu | N.A | All List view columns offered |
| Then by | Select one menu | N.A | All List view columns offered |
To query a Cash balance
In order to perform a successful query a user needs to complete at least one of the following mandatory fields along with the Timeframe value and Date that are always pre-filled with the current date current Timeframe respectively:

After having clicked on the "Query" button, the List View is displayed in the bottom side part of the screen.
Saved Query
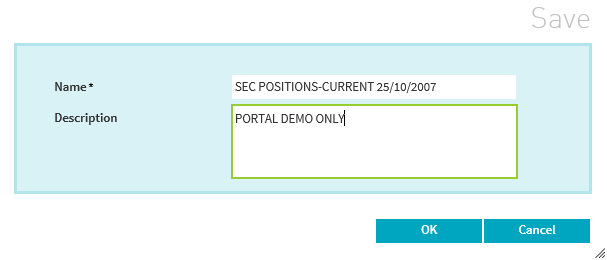
Users can save predefined queries in form of query templates which can be loaded by selecting any one of pre-saved queries from the predefined saved query list. These queries are not automatically run.
In case of multiple saved queries, the user has the option to set any one of them as default so that each subsequent time the user enters the specific Query page, the search criteria of this default query is automatically loaded.

Lookups
 ).
).Limitations of the query
It is not always feasible to query for all cash instructions available to a user at one go. The below restrictions have been imposed on the query parameters in view of maintaining a performant and responsive application -
3.1.2 List view
In the List view you can see a summary of Security positions that matched your query criteria.

Columns ordering facility
In the list view, you can re-order the columns, by holding the mouse button down while dragging the column header box to the right or left. When the mouse button is released, the column is placed in its new location.
The order is automatically saved.
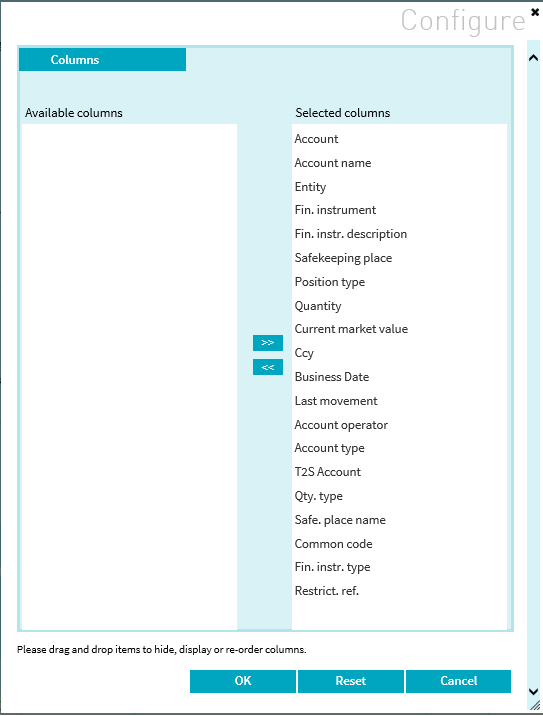
By clicking on the Configure button at the top right of the List view, you can choose the order of your columns and remove or add columns to your list view. You cannot move or remove
If you click on Reset, it will restore the list view to the default view for that type of query and any customisation will be lost.
Export facility

User can select "Export All" in order to export all the records present in the query results. The number of rows is calculated and the user must validate the request before the export all is executed. Please note that only a maximum of 50,000 records can be exported using this feature.
User can select "Export List" in order to export all the records returned by the Query within the List view.
User can select "Export Selection" in order to export only the selected (checked) rows.
The user can print the results in a PDF format by:
The same requirements as for the Export function apply here.
View Movements
The view movements displays all details of a balance in a main tab and accompanying sub-tabs. In order to see the view movement of one or more balances, the user can perform one of the following:


Cash Instruction Detailed View-Main Tab
